


Everything ready? So lets move to the first step.
Step: 1 Preparing the Image
OK lets prepare our image now.Open Photoshop and create a new image. Choose a background color of your choice. I am here choosing black. Now paste every letter on your newly created image. Each one on a separate layer. Arrange them according to your choice. Now you will have something like this.

OK now go to the tools bar and select the 'Magic Wand' tool or simply press 'w' it will be automatically selected.

Now select your letters front face with it.

After selecting the face right click and select feather option.Set feather radius to 1 pixel. Like this.

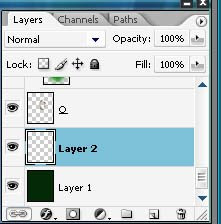
Then press 'OK' Button. Now again right click and select 'Layer via Cut' option. See the image below.

Do the same with other letters. Now you willhave something like this. Note that I have switched off the visibility of other layers.

So our image is ready now for further designing.
Step: 2 Adding Colors to the letters.
Now as the image is ready it's time to add some colors to our letters.For this purpose go to layers palette and select the layer of first separated face.

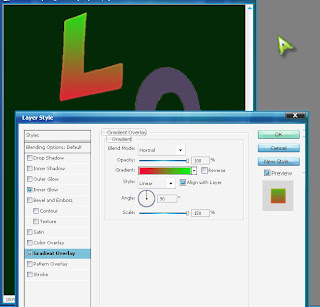
Now right click and select 'Blending Options'

A new window will appear. Select 'Gradient Overlay' option. Select blend mode of Normal, Opacity 100%, style Linear (but you can choose whatever you think is better for your design), Angle 90 degree (it again depends upon your choice that what you want), Scale 150%. You should choose a gradient of two colo rs and it is better if the colors are bright. Then select 'Inner Glow' option. If you don't think it a good thing than no problem don't select it. But I will recommend it because it will give some extra beauty to the edges. See the image below.
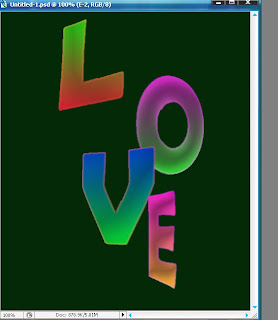
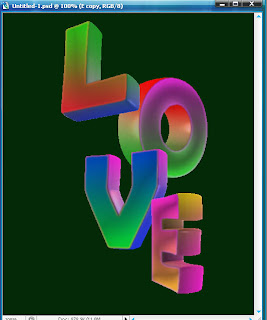
Repeat the same procedure for other layers. Now you should have something like this.
Now select the layer which was kept invisible during the whole above process. Yes I am talking about the extruded parts of the letters. Now it's time to make them visible. OK now duplicate the layer of first letter.
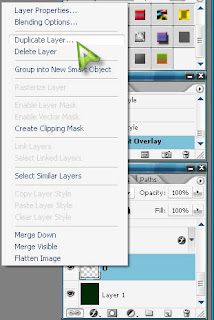
Now select the duplicated layer. Right click and select the 'Create Clipping Mask' Option.

Now go to the Tools Bar and select the brush tool or simply press 'B'. Select the brush which I have selected here. This brush is in the default brushes.

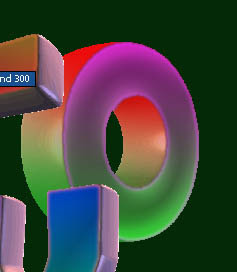
Now (while keeping the clipping layer still selected) start coloring the extruded parts of the letters. It is better to choose more than one colors and the colors should be somewhat matching with the front face colors.See the letter 'O' below.
Repeat the same procedure for other letters. It is better to keep changing the colors for every letter.Now you should have something like below.
Now it's time to give some extra 3D effect to our Letters. Go to the Tools Bar and select the 'Burn' tool.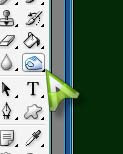
Now apply the tool one by one on the extruded parts of the letters (in clipping asked layers) where needed. It will help to make extruded parts more like 3D. The result of this step will be somewhat like this.

Step: 3 Adding the Background
Now as our letters are ready so its time to add some background. Here I am going to add a simple one you can add whatever you like. First create a new layer above the black layer.
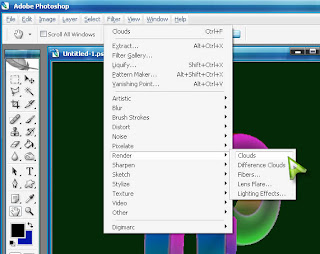
Before adding the background choose some colors, here in the image below you can see that on the tools bar I have chosen black and blue colors. Now go to 'Filters' then 'Render' and then select 'Clouds'.
The result you will get something like this.
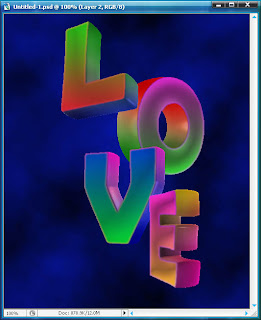
So our background is ready now.
Step: 4 Decorations
Now its time to decorate our image. For decoration purpose you can use brushes or shapes. Here I am going to use brushes. These brushes are "Suddenly Spring" designed by gvalkyrie. You can download these brushes fro here. Download. Create a new layer above the clouds layer. Select the brush toll from the tools bar and choose your brush.
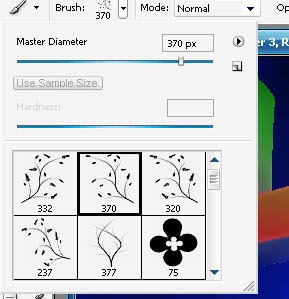
Set the appropriate diameter and apply on the newly created layer.Use different colors and brushes and keep the blend mode normal. See how I have applied these brushes.
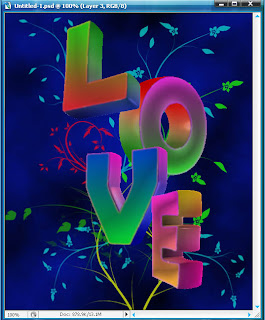
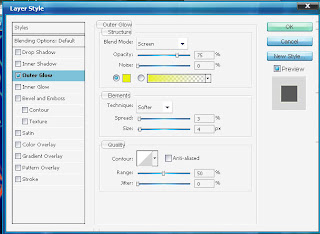
Now select this layer and go to the 'Blending Options'. Select the 'Outer Glow' option. Set the blend mode to 'screen', opacity 75%, Technique 'Softer', spread 3%, size 4 pixels. This will add a good glowing effect to our flowery background.
This is the result of this Glowing effect.
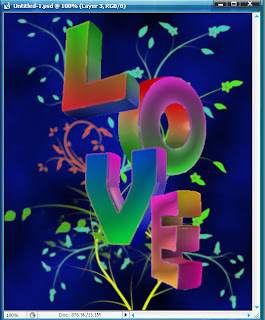
Here is the final image.

I hope this tutorial will help you. Note that there is always a chance of improvement.

A new window will appear. Select 'Gradient Overlay' option. Select blend mode of Normal, Opacity 100%, style Linear (but you can choose whatever you think is better for your design), Angle 90 degree (it again depends upon your choice that what you want), Scale 150%. You should choose a gradient of two colo rs and it is better if the colors are bright. Then select 'Inner Glow' option. If you don't think it a good thing than no problem don't select it. But I will recommend it because it will give some extra beauty to the edges. See the image below.

Repeat the same procedure for other layers. Now you should have something like this.

Now select the layer which was kept invisible during the whole above process. Yes I am talking about the extruded parts of the letters. Now it's time to make them visible. OK now duplicate the layer of first letter.

Now select the duplicated layer. Right click and select the 'Create Clipping Mask' Option.

Now go to the Tools Bar and select the brush tool or simply press 'B'. Select the brush which I have selected here. This brush is in the default brushes.

Now (while keeping the clipping layer still selected) start coloring the extruded parts of the letters. It is better to choose more than one colors and the colors should be somewhat matching with the front face colors.See the letter 'O' below.

Repeat the same procedure for other letters. It is better to keep changing the colors for every letter.Now you should have something like below.

Now it's time to give some extra 3D effect to our Letters. Go to the Tools Bar and select the 'Burn' tool.

Now apply the tool one by one on the extruded parts of the letters (in clipping asked layers) where needed. It will help to make extruded parts more like 3D. The result of this step will be somewhat like this.

Step: 3 Adding the Background
Now as our letters are ready so its time to add some background. Here I am going to add a simple one you can add whatever you like. First create a new layer above the black layer.

Before adding the background choose some colors, here in the image below you can see that on the tools bar I have chosen black and blue colors. Now go to 'Filters' then 'Render' and then select 'Clouds'.

The result you will get something like this.

So our background is ready now.
Step: 4 Decorations
Now its time to decorate our image. For decoration purpose you can use brushes or shapes. Here I am going to use brushes. These brushes are "Suddenly Spring" designed by gvalkyrie. You can download these brushes fro here. Download. Create a new layer above the clouds layer. Select the brush toll from the tools bar and choose your brush.

Set the appropriate diameter and apply on the newly created layer.Use different colors and brushes and keep the blend mode normal. See how I have applied these brushes.

Now select this layer and go to the 'Blending Options'. Select the 'Outer Glow' option. Set the blend mode to 'screen', opacity 75%, Technique 'Softer', spread 3%, size 4 pixels. This will add a good glowing effect to our flowery background.

This is the result of this Glowing effect.

Here is the final image.

I hope this tutorial will help you. Note that there is always a chance of improvement.
No comments:
Post a Comment